
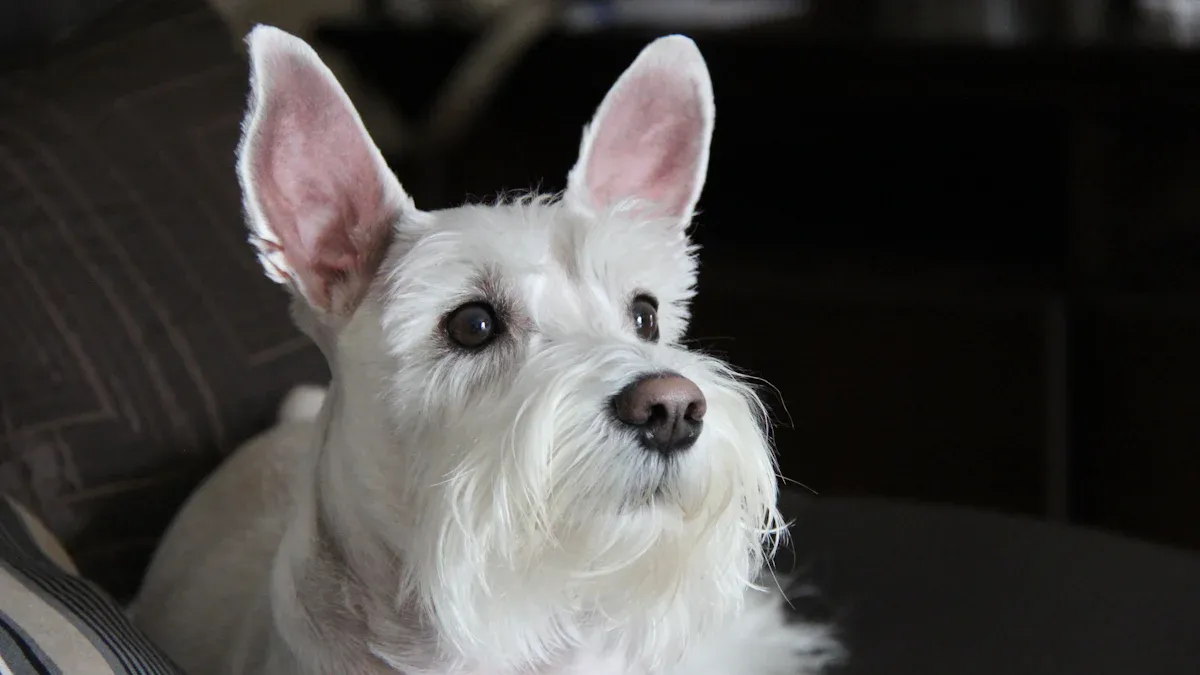
How to Groom a Scottish Terrier Puppy
Start grooming your Scottie puppy the day you bring them home. Scottish Terriers have a double coat—a harsh, wiry outer layer and a soft, dense undercoat—that needs regular attention from puppyhood. The goal isn’t just a pretty dog; it’s preventing mats, reducing shedding, and getting your pup comfortable with handling before their adult coat comes in around 10–12 months.

Here’s the short answer: brush your Scottie puppy 2–3 times per week, bathe every 3–4 weeks, and trim nails weekly. That routine builds good habits and keeps their coat healthy. Wait any longer between brushings and the soft puppy undercoat will start matting against the wiry guard hairs.
What You’ll Need Before You Start
Gathering the right tools first makes the whole process faster and less stressful for your puppy. Scottish Terrier coats are dense, so cheap brushes won’t cut it.
Brushes and combs:
- Slicker brush (medium-firm bristles) – reaches the undercoat without scratching skin
- Stainless steel comb with both wide and fine teeth – for checking your work and detangling face and legs
- Undercoat rake (optional but helpful once the adult coat starts coming in)
Bath gear:
- Dog-specific shampoo and conditioner – oatmeal-based formulas work well for sensitive Scottie skin
- Towels (2–3 per bath)
- Non-slip bath mat
Trimming and nail care:
- Straight grooming shears (blunt-tip for safety) – for sanitary trims and paw tidying
- Nail clippers (guillotine or scissor style) or a Dremel-style grinder
- Styptic powder (to stop bleeding if you cut the quick)
Disclosure: Some product links in this guide are affiliate links. If you purchase through them, we may earn a small commission at no extra cost to you.
The 5-Step Puppy Grooming Routine
Puppy grooming sessions should stay under 10–15 minutes at first. Short, positive sessions build trust. Lengthen them gradually as your Scottie settles into the routine.
Step 1: Brush thoroughly before bathing
Always brush a dry coat first. Water makes mats tighter and harder to remove.
1. Start at the head and work backward toward the tail.
2. Use the slicker brush in small sections, lifting the topcoat to reach the undercoat.
3. Pay extra attention behind the ears, under the collar area, and along the belly—mats hide here first.
4. Follow up with the stainless steel comb to check for any tangles you missed.
Early checkpoints: If the comb snags anywhere, stop and work that spot gently with the slicker. Never yank through a mat. For large mats, cut them out with shears (not scissors) or see a professional groomer.
Step 2: Bath with warm water and dog-specific products
Scottie coats are naturally water-resistant, so wetting them thoroughly takes patience.
- Use lukewarm water (not hot) and wet the coat completely before applying shampoo.
- Work shampoo in with your fingers, massaging down to the skin. Focus on the belly and feet where dirt collects.
- Rinse thoroughly—residual shampoo causes itchiness and flakes.
- Apply conditioner, leave it for 1–2 minutes, then rinse again. Conditioner keeps the wiry coat flexible instead of brittle.
- Squeeze excess water out with your hands, then wrap your puppy in a towel and blot (don’t rub—rubbing causes tangles).
Step 3: Dry completely
Scotties with damp undercoats can develop hot spots or skin irritation.
- Towel-dry as much as possible, changing towels when one gets soaked.
- If your puppy tolerates it, use a low-heat blow dryer on the fluff setting. Keep the nozzle several inches away and moving constantly.
- Brush gently while drying to prevent the coat from drying in weird tufts.
Friction point: Many Scottie puppies dislike the sound of a blow dryer at first. Let them sniff it while it’s off, then turn it on low and point it away from them for a few seconds before trying it on their coat.
Verification step before moving on: Run your fingers through the coat at the skin level, especially along the back and behind the ears. The skin should feel completely dry, not damp or cool. If any area feels moist, keep toweling or low-heat drying—trapped moisture under the dense coat is the fastest route to a hot spot.
Step 4: Trim nails and tidy paw hair
- Trim nails weekly, just the tip. If you hear a click on the floor, they’re too long.
- For dark nails (common in Scotties), take tiny snips and watch the cross-section. A gray or pinkish dot means you’re close to the quick.
- Trim the hair between paw pads flush with the pad surface using straight shears. This prevents dirt and snow from balling up between the toes.
Step 5: Clean ears and brush teeth weekly
- Use a vet-approved ear cleaner and a cotton ball (never a cotton swab inside the ear canal). Scotties with floppy ears need extra airflow to prevent infections.
- Brush your puppy’s teeth with enzymatic dog toothpaste 2–3 times per week minimum.
What to Do When Brushing Reveals a Mat — Your Branch Point
You brush your puppy’s flank and hit a snag. The comb won’t glide through. Your next move depends on what you feel at that spot.
- If the mat is small and loose (you can wiggle it away from the skin): Work it gently with the slicker brush in short, back-and-forth strokes, then comb through. The mat should break apart without pulling skin.
- If the mat is small but tight against the skin: Stop brushing immediately. Apply a detangling spray or a drop of conditioner, let it sit for 2 minutes, then try working the edges with your fingers before using the slicker. If it doesn’t loosen in 5 minutes, cut it out with blunt-tip shears.
- If the mat is large, hard, or close to the skin: Do not attempt to brush or cut it yourself. Large mats near the skin mean a high risk of cutting your puppy. Book a professional groomer within 48 hours.
This branch saves you from making a bad situation worse. Brushing through a tight mat pulls the skin and creates a negative association with grooming that can take weeks to undo.
When to Stop DIY and Call a Professional
At-home grooming works for most of your Scottie puppy’s needs, but these situations are your cue to hand it off:
Stop DIY and book a groomer when:
- You find a mat that is larger than a quarter and pressed flat against the skin
- Your puppy yelps, flinches, or pulls away consistently during nail trims after three attempts
- The adult coat starts coming in (around 10–12 months) and you want the first hand-strip or clip done correctly
- You cut the quick twice in one session — your puppy may develop lasting fear of nail trims if you push through
Escalation threshold: If your puppy shows signs of skin irritation (red patches, flakes, scabs, or excessive scratching) after two grooming sessions despite using proper tools and products, stop grooming and see your vet. This could indicate allergies, fungal infection, or a reaction to a product, not a grooming technique problem.
One Mistake Pattern Owners Repeat (and How to Avoid It)
The mistak e: Brushing only the top layer of the coat because the puppy seems fine, then discovering massive undercoat mats two weeks later.
Why it happens: The Scottie’s wiry topcoat hides what’s happening underneath. From above, the coat looks smooth and tangle-free. Meanwhile, the soft puppy undercoat is felting against the skin in a layer you can’t see.
How to catch it: Every third brushing session, part the coat down to the skin in three spots — behind the left ear, along the middle of the back, and on the belly. If you see any clumps or webbing at skin level, you’ve caught a mat forming before it becomes a problem. A quick pass with the slicker at skin level will break it up.
If you miss it: Large undercoat mats that go unnoticed for two weeks may require shaving, which ruins the coat texture for months. The safer move is a professional dematting session.
The Decision Criterion That Changes Everything: Coat Texture
Not all Scottie puppies have the same coat. Some have softer, fluffier puppy coats that mat faster. Others have coarser hair from the start. This one factor determines how often you need to brush and what tools work best.
| Coat Texture | Brush Frequency | Best Brush Type | Mat Risk |
|---|---|---|---|
| Soft/fluffy (puppy fluff dominant) | Every other day | Slicker brush + comb | High – check daily |
| Coarse/wiry (adult coat coming in early) | 2–3 times per week | Undercoat rake + slicker | Low to moderate |
| Mixed (most Scottie puppies) | Every 2 days | Slicker first, then comb | Moderate – focus behind ears and legs |
How to check your puppy’s coat type: Pull a single guard hair between your fingers. If it feels like soft cotton, you have a high-mat coat. If it feels stiff and wire-like, your puppy is transitioning to adult coat faster.
For soft-coated puppies, add a detangling spray before brushing and schedule a professional groom every 6–8 weeks. For coarse-coated puppies, you can stretch to every 8–10 weeks.
Quick Decision Aid: Is Your Puppy’s Coat Healthy?
Use these five checks before and after each grooming session. If you answer “no” to any item, adjust your routine or escalate to a vet or groomer.
1. Check for mats: Can you run a wide-tooth comb from skin to coat tip without snagging anywhere? (Yes/No)
2. Check skin condition: Is the skin pink and free of red patches, flakes, or scabs after brushing? (Yes/No)
3. Check nail length: Do the nails sit above the floor when your puppy stands naturally? (Yes/No)
4. Check ear odor: Do the ears smell neutral (no yeasty or musty odor)? (Yes/No)
5. Check coat shine: Does the coat have a natural sheen, not a dull or greasy appearance? (Yes/No)
If you answer “no” to two or more items, book a vet check or professional grooming consult within the week.
Save This Guide
✨ Key takeaway: Start grooming your Scottish Terrier puppy early, brush 2–3 times per week (more for soft coats), and use breed-specific tools. Part the coat to skin level every third session to catch hidden mats before they tighten. Consistent short sessions beat occasional marathon grooming every time. Bookmark this guide—you’ll want the step sequence handy when adult coat season hits.

