Tying Frenchie Ears: Guide: What Every Owner Should Know
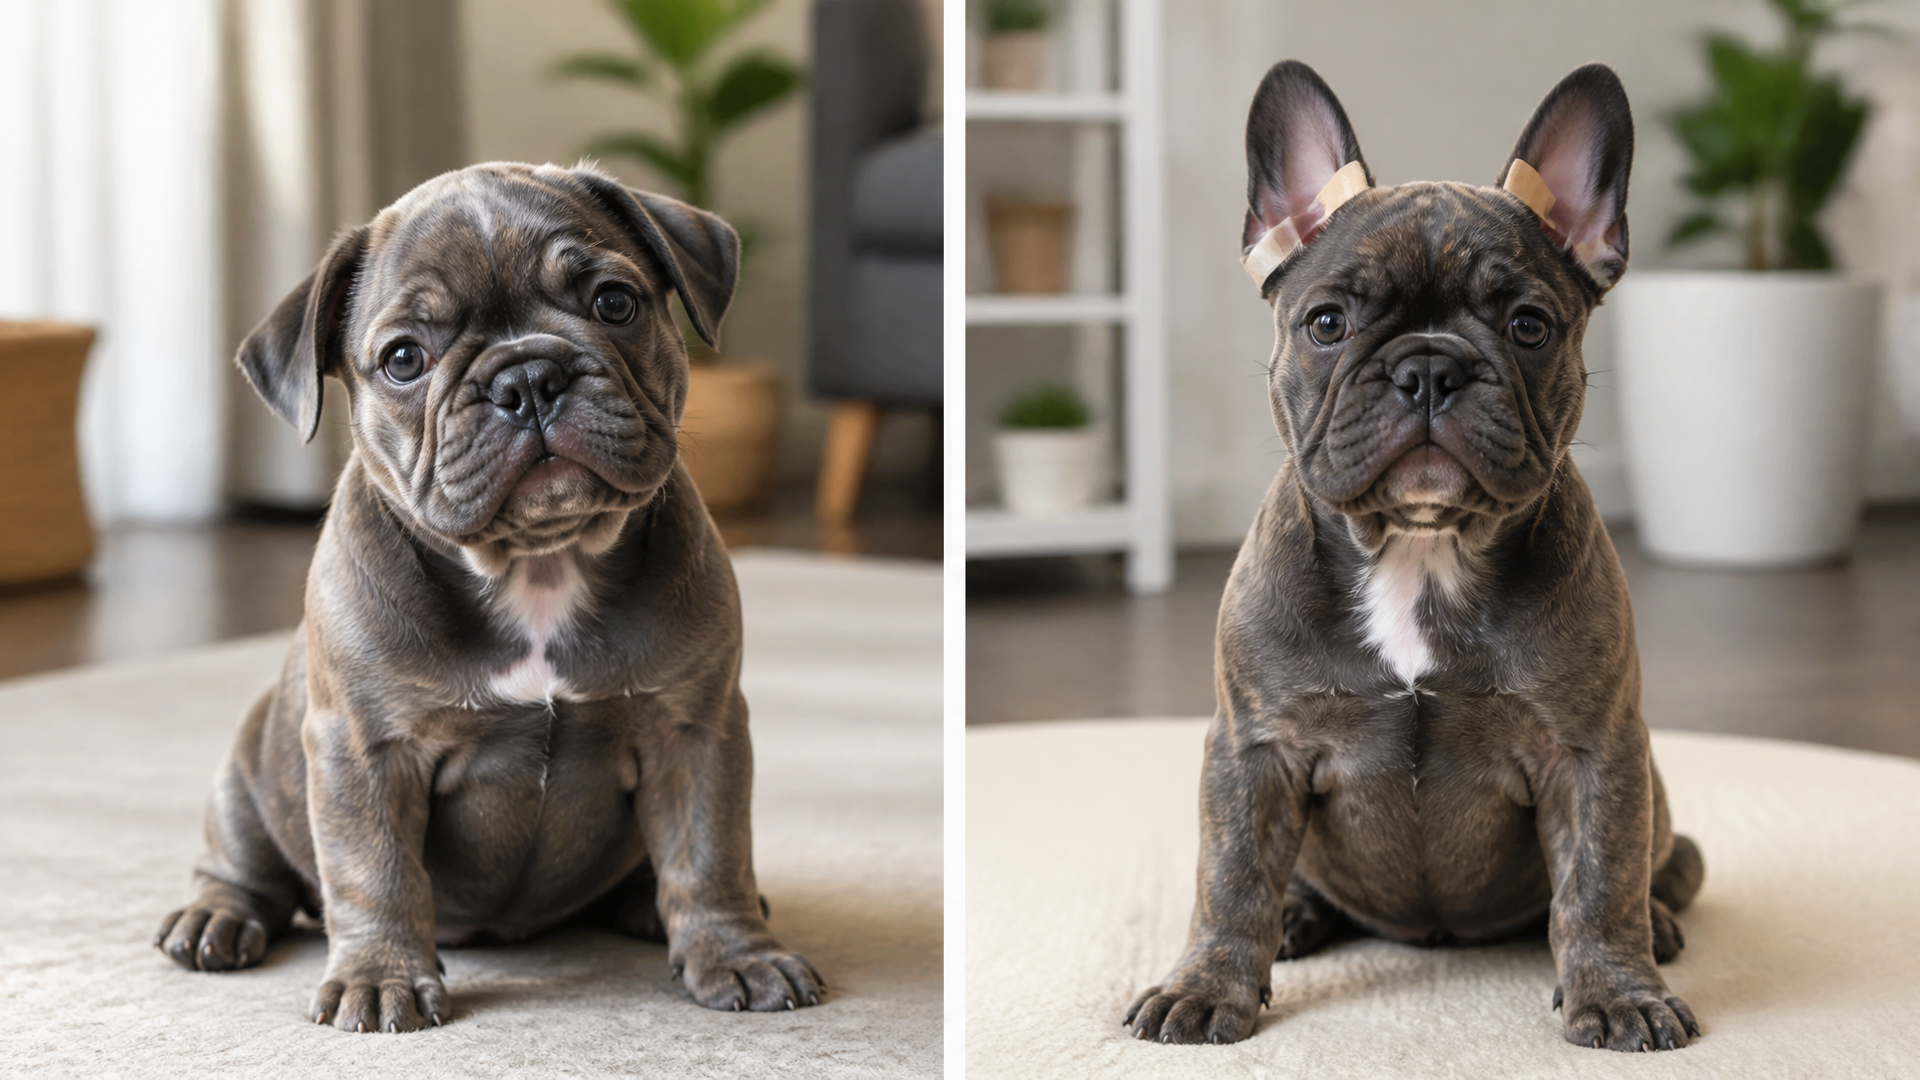
Tying (or taping) your French Bulldog puppy’s ears is a common method to help their naturally floppy ears stand up as the cartilage firms up. The goal is to support the ear in a natural upright position without restricting blood flow or causing irritation. When done correctly, it can help achieve those iconic bat ears, but improper technique risks infection or permanent damage. Here’s exactly what you need to know, what supplies to use, and how to spot trouble early.

Why Some French Bulldogs Need Help Standing Their Ears
French Bulldog puppies are born with soft, folded ears. As they grow, the cartilage hardens and the ears typically begin to stand between 4 and 6 months of age. For some puppies, the ears don’t get enough support naturally, so taping gives them a gentle “scaffold” to encourage proper positioning. Not every Frenchie needs taping—many stand on their own. But if you notice one ear drooping or both staying folded past 12 weeks, taping is a common, safe intervention. The key is using the right materials and technique; duct tape, superglue, or any non‑breathable adhesive can cause serious harm.
What this means for you: If your puppy is between 8 and 12 weeks old and one or both ears are still floppy, taping is worth trying. If your puppy is already past 16 weeks, the cartilage is hardening and taping is unlikely to work. In that case, accept the floppy ears—they’re part of your dog’s charm.
How to Safely Tape Your Frenchie’s Ears – Step by Step
Follow these steps carefully, and check your puppy’s ears every day. This process works best when you start between 8 and 12 weeks of age.
Materials You’ll Need
- Hypoallergenic, porous medical tape – Look for brands like Nexcare Gentle Paper Tape or a breathable surgical tape. Avoid heavy‑duty tapes; they stick too strongly and trap moisture.
- Scissors – Small, sharp scissors to cut tape strips.
- Cotton balls or gauze – To stuff lightly inside the ear for support (optional but common).
- Vet‑approved ear cleaner – Only use a cleaner specifically for dogs, not hydrogen peroxide or alcohol.
This article contains affiliate links – if you purchase through them, we may earn a small commission at no extra cost to you.
The Taping Process
1. Clean the ear. Use a small amount of dog‑safe ear cleaner on a cotton ball. Gently wipe the inside of the ear flap and the ear canal opening. Let it air‑dry completely.
2. Prepare the cotton support. Roll a small wad of cotton or gauze and place it lightly inside the ear canal opening. This will help prop the ear upright without pressing on the cartilage.
3. Cut two tape strips. Each strip should be about 2–3 inches long. Round the corners slightly to reduce edges that catch on fur.
4. Apply the first strip. Start from the base of the ear (where it meets the head) and gently wrap the tape around the ear and the cotton support. Do not wrap tightly – the tape should hold the ear upright without pinching. Leave a small gap at the top for air circulation.
5. Apply the second strip. Place it perpendicular to the first one, crossing over the ear to add stability. Again, keep it loose enough that you can slide a finger between the tape and the ear.
6. Check tightness. After taping, slide your pinky finger between the tape and the ear. If you can’t easily slide it in or the ear looks pale, the tape is too tight. Remove immediately and re‑apply with less tension. This is your concrete verification step: a loose tape that still holds shape is the sweet spot.
How Long Should Ears Be Taped?
Tape one ear at a time or both together if needed. Leave the tape on for 48 hours, then remove it gently (use a bit of baby oil to loosen adhesive if it sticks). Let the ear rest for 12 hours before reapplying. Repeat this cycle for 2–3 weeks. Most puppies show improvement within 10 days. If you see no change after 4 weeks, or if the ear becomes red or sore, stop and consult your vet.
One Early Failure Sign Owners Miss
The most common problem owners hit is taping too tightly or leaving tape on too long, which cuts off circulation or traps moisture. This can lead to:
- Red, inflamed skin – Especially at the base of the ear.
- Foul odor – A sign of bacterial or yeast infection.
- Excessive scratching – The puppy shakes its head or paws at the ear.
- Loss of hair – Where the tape was applied.
How to detect it early: Within 2 hours of taping, lift the edge of one strip to inspect the skin underneath. Healthy skin should be pink and dry. If you see redness, moisture, or pus, remove all tape and call your vet. Never “wait and see” with ear issues – infections in French Bulldogs can worsen quickly due to their narrow ear canals.
Three Tips That Make Taping Work
These three tips come from experienced breeders and veterinarians who regularly tape Frenchie ears.
1. Tape only clean, dry ears.
Apply tape immediately after cleaning and drying. Tape on damp skin creates a breeding ground for bacteria.
Common mistake: Taping after a bath or when the ears are still moist from cleaning.
2. Use a consistent routine.
Tape at the same time each day and keep a simple log: note which ears are taped, when you last removed tape, and any color changes. This helps you spot trends early.
Common mistake: Leaving tape on for days without checking, or skipping rest periods between taping sessions.
3. Support ear position, don’t force it.
The tape should lift the ear slightly – aim for a gentle 45‑degree angle from the head. If you tape the ear straight up like a radar dish, it can cause discomfort and won’t strengthen the cartilage correctly.
Common mistake: Over‑correcting by pulling the ear too far back or upright, which stresses the base.
When to Stop Taping – And When to Accept Floppy Ears
Stop taping once the ears stand on their own for 48 hours without support. This usually happens between 4 and 6 months of age. If the ears still droop after 6 months, the cartilage has likely hardened in that position. Taping won’t change it, and that’s perfectly fine – many French Bulldogs have “rose ears” (folded back) and live healthy, happy lives. Always accept your dog’s natural ear shape; forcing them upright after the growth window can cause chronic pain.
A realistic trade-off: Taping works for about 70% of Frenchies if started early. The other 30% naturally have weaker cartilage that never fully stands—no tape can change that. Trying to force it with extra‑tight tape or longer wear times only risks injury. If your puppy’s ears don’t stand, you haven’t failed; you’ve just got a Frenchie with a different look.
Save This Guide – Bookmark this page so you have the steps, materials, and warning signs handy when you’re taping your Frenchie’s ears. The key takeaway: use gentle, breathable tape, check daily for redness or odor, and stop immediately if anything looks wrong. When in doubt, always consult your veterinarian before starting a taping routine.
FAQ – Tying Frenchie Ears
At what age should I start taping my Frenchie’s ears?
Start between 8 and 12 weeks, when the ear cartilage is still soft and responsive. Starting later (after 16 weeks) is much less likely to succeed.
Can I use regular adhesive tape from a drugstore?
No. Only use hypoallergenic, porous medical tape designed for skin. Store‑brand first‑aid tape or duct tape will stick too strongly, cause irritation, and prevent airflow – that combination can lead to infection.
How long does it take for ears to stand after taping?
Most puppies show noticeable improvement within 10–14 days of consistent taping. Full results typically appear within 3–4 weeks. If you see no change after a month, stop taping and have your vet examine the ears.