Demo of a Realistic Painting of a Beagle Dog
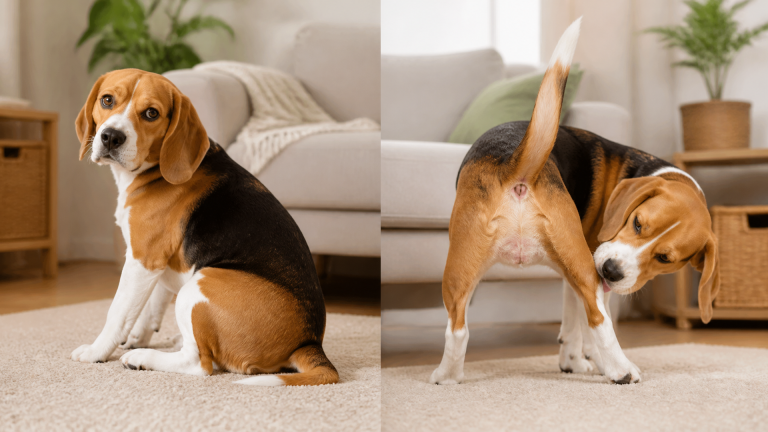
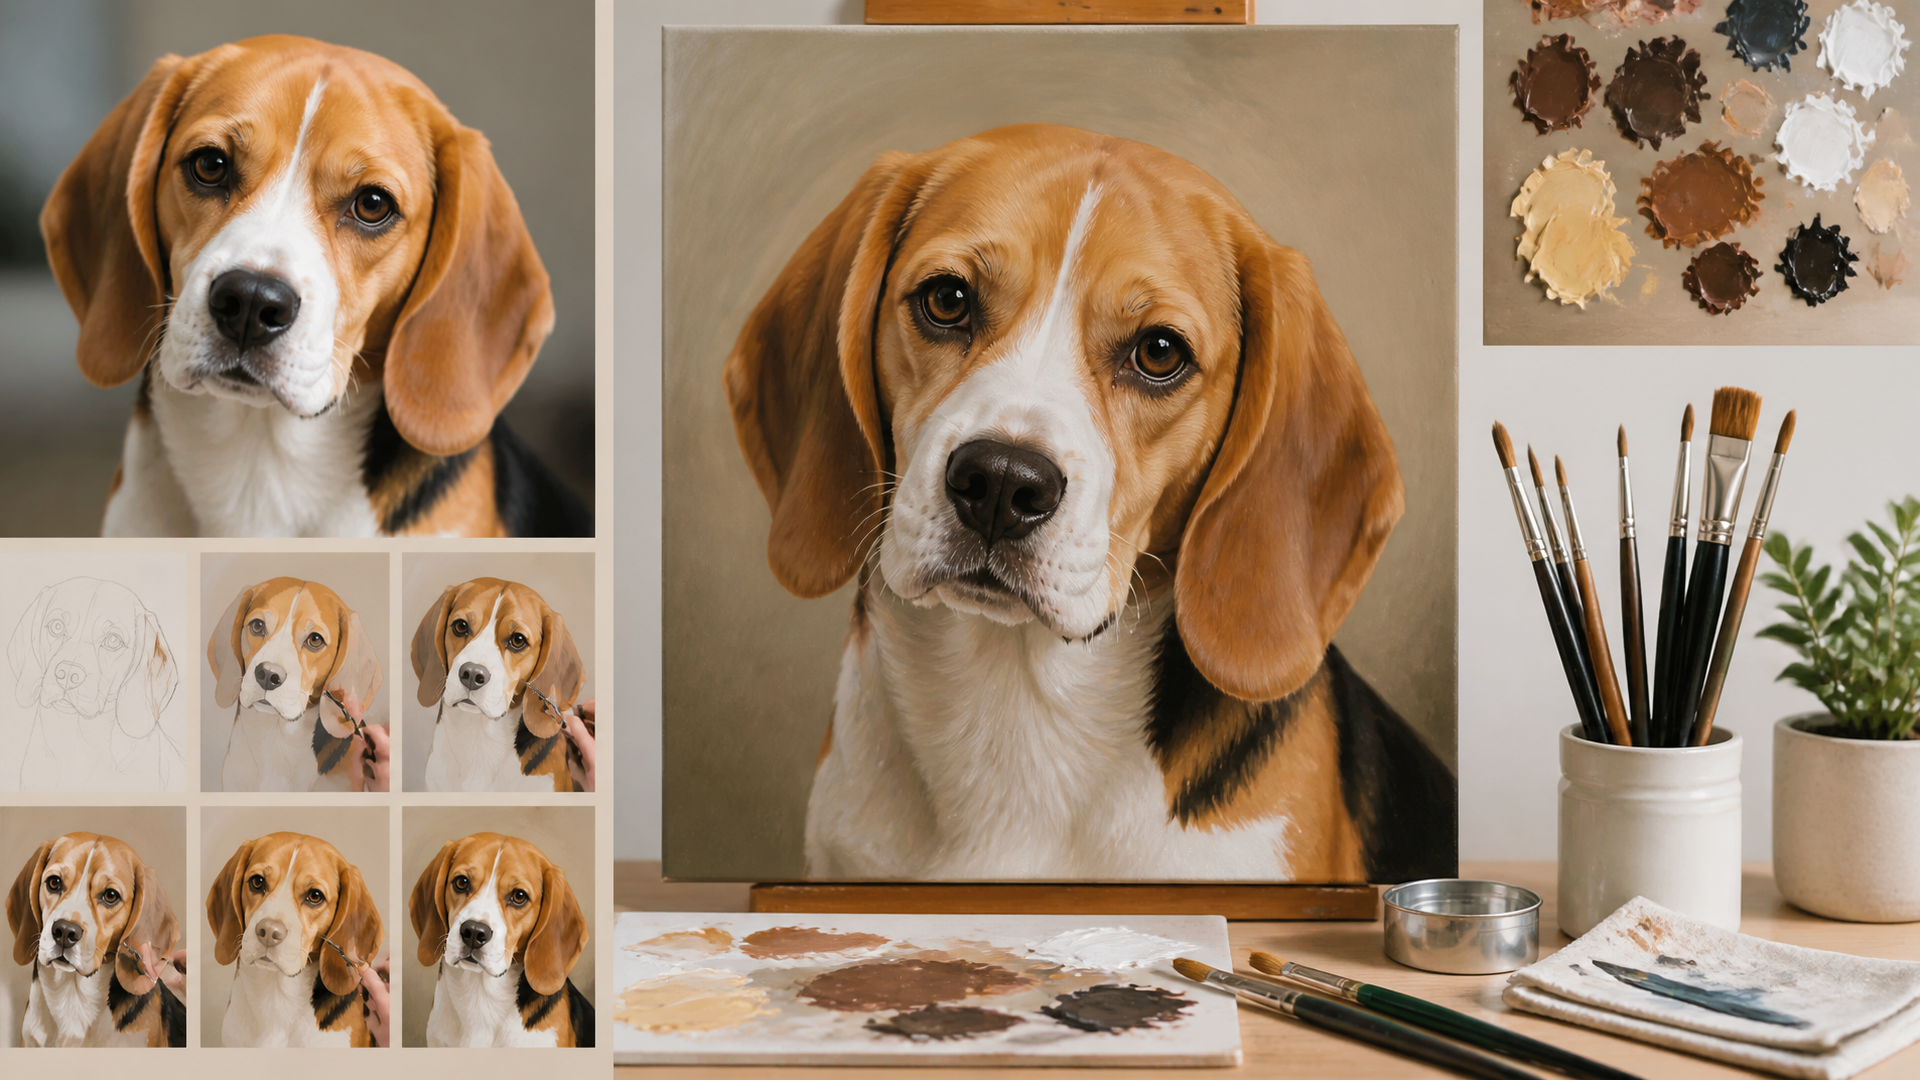
Want to paint a beagle that looks like it could jump off the canvas? The secret isn’t more brushstrokes — it’s understanding what makes a beagle look like a beagle. Focus on the long, floppy ears, the white blaze down the forehead, and the soulful brown eyes. Start with a clear reference photo, block in the tricolor pattern (black saddle, tan eyebrows and legs, white chest and tail tip), then build fur texture with thin layers. The result? A painting that captures the breed’s personality, not just a generic dog face.

Important note: This demo is designed for acrylic or oil painting on canvas. It works poorly for watercolor (hard to correct mistakes) or digital painting (different layering approach). If you’re using watercolor, skip the opaque mixing steps and adapt the fur layering for drybrush washes.
What Makes a Beagle Painting Look Realistic
Realistic beagle paintings start with these breed-specific details:
- Ears: They should droop low, framing the face. Short ears are the #1 giveaway of an amateur beagle portrait.
- Forehead blaze: A white stripe running down the center — width varies by individual dog, but getting it right defines the head shape.
- Eyes: Warm brown, with a gentle, curious expression. Too round or too dark and the face reads as aggressive or lifeless.
- Coat tricolor: Black saddle across the back, tan markings above the eyes and on the legs, white on the chest, muzzle, and tail tip. Some beagles have blue-ticked or red-ticked white areas — check your reference photo.
Common mistake: Painting the black saddle as a flat, dark blob. Beagles actually have layered black, brown, and white hairs in that area. Use a mix of ultramarine blue and burnt umber with a tiny amount of white to create depth.
Step-by-Step Demo for Painting a Realistic Beagle
Each step builds on the last. Acrylic paint is recommended for beginners because it dries fast and allows easy corrections. For oil painters, use the same method but extend drying time between layers by making each layer thinner.
Step 1: Choose and Prep Your Reference Photo
Use a well-lit, front-facing or three-quarter view photo where your beagle’s eyes are visible and in focus. The photo should have natural daylight (no flash) to show true coat colors. Print it in high resolution or keep it on a tablet next to your canvas. Also print a black-and-white copy to check tonal values — this helps you see where the dark and light areas fall.
Actionable tip: Crop the photo so the head and shoulders fill the frame — this helps you focus on the features that matter.
Step 2: Sketch the Basic Proportions
Lightly draw the head, ears, neck, and body with a pencil or thinned paint. Keep the ears long and low, the muzzle slightly blunt, and the eyes set wide apart. Common mistake: Making the head too narrow — beagles have a broad skull between the ears. To verify your sketch: hold a mirror up to your canvas or flip the photo reference upside down. If the ears or muzzle look mismatched in the flipped view, adjust them now.
Step 3: Block in the Base Colors
Mix separate piles for the black saddle, tan markings, white areas, and a mid-brown for the ears. Use a flat brush (1 inch or 2.5 cm) to cover each area with a thin, even layer. For the white areas, mix titanium white with a tiny amount of yellow ochre — this prevents a chalky, dead-white look. Don’t worry about texture yet; you’re just establishing the color map.
Step 4: Build Fur Texture with Layering
Switch to a filbert brush (size 8 or 10) or a fan brush. Use short, flicking strokes in the direction the fur grows. For the black saddle, layer a mix of ultramarine blue + burnt umber + white over the black base. For the white chest, use titanium white with a touch of yellow ochre. Let each layer dry completely (acrylic: 10–15 minutes; oil: 24–48 hours) before adding the next.
Verification check: After two layers, hold your painting next to the reference photo at arm’s length. If the fur direction or color patches don’t match, you need another pass. If they do, you can move to the eyes and nose.
Step 5: Paint the Eyes and Nose
These are the focal points. For the eyes: Paint the iris with burnt sienna and a tiny bit of ultramarine blue (to match typical beagle brown). Add a small white highlight dot at the top of the iris, and a sliver of dark shadow under the upper eyelid using a mix of burnt umber and black. For the nose: Use pure burnt umber darkened with a touch of black. Paint the nostrils as crescent shapes — don’t make them round. Highlight the top of the nose with a thin line of raw umber mixed with white.
Step 6: Add Final Highlights and Whiskers
Use a liner brush (size 2) and thinned white paint to add whiskers. A few faint gray strokes near the corners of the mouth add realism. Expert tip: Dry brush a tiny amount of pure white across the tips of the ears and the top of the head to create a soft sheen. This mimics the natural gloss of beagle coat oils.
Must-Know Tips for Beagle Fur and Color
These three expert tips will save you hours of frustration and dramatically improve the realism of your beagle painting.
Expert Tip 1: Mix Your Own Black for the Saddle
Straight black paint makes fur look flat and dead. Instead, mix ultramarine blue and burnt umber (roughly 2:1) with a touch of titanium white. This gives a warm, natural black that matches real beagle fur. Common mistake to avoid: Using black from a tube — it dominates the painting and kills depth. You’ll end up with a dark blob instead of layered, dimensional fur.
Expert Tip 2: Use a Dry Brush for White Fur
The white patches on a beagle’s chest and tail tip have a soft, fluffy texture. Load a flat brush with a tiny amount of titanium white + yellow ochre, wipe most of it off on a paper towel, then lightly scuff it over the area. The result is a feathery, translucent layer that looks more realistic than solid white. Common mistake: Painting white areas with solid strokes — they end up looking like paper. If you already did that, wait for it to dry, then lightly sand with fine-grit sandpaper before dry brushing over it.
Expert Tip 3: Paint Eyes Last, Not First
This is the counter-intuitive step most beginners get wrong. Once the surrounding fur layers are dry, paint the eyes wet-on-wet. This lets you blend the dark edge of the eyelid and the iris together, creating a natural transition. Common mistake: Painting eyes first and then trying to paint fur around them — you end up with hard edges that look like painted-on stickers. To avoid this, mask the eye area with painter’s tape during fur layers, then remove it right before painting the eyes.
Quick Reference Checklist (Before You Start)
Tick these off before you even open your paint:
- [ ] High-resolution reference photo in good light (preferably a close-up headshot with natural daylight)
- [ ] Printout of the photo, plus a black-and-white copy for tonal values
- [ ] Primed canvas or painting board (gesso applied and dried — at least two coats for acrylic)
- [ ] Paint colors: titanium white, yellow ochre, burnt sienna, burnt umber, ultramarine blue (skip pre-mixed black)
- [ ] Brushes: flat (1 inch/2.5 cm), filbert (size 8), liner (size 2), fan brush for fur texture
- [ ] Palette with a lid or stay-wet palette to keep acrylic paints workable (for oil: glass or wooden palette)
- [ ] Paper towels, water cup (for acrylic) or solvent (for oil)
- [ ] Painter’s tape (optional, to mask eyes or sharp edges)
Medium Comparison: Which Paint Works Best for Beagle Fur?
| Medium | Best Feature | Drawback | Best For |
|---|---|---|---|
| Acrylic | Fast drying, easy layering | Can dry before blending | Beginners, step-by-step painters who want quick results |
| Oil | Slow blending, rich colors | Long drying time, needs thinners | Experienced painters who want soft gradients and can wait |
| Watercolor | Translucent, quick to set up | Hard to correct mistakes, no white paint | Loose, impressionistic styles (not photo-realism) |
Practical implication: If you want to finish a realistic beagle portrait in one weekend, choose acrylic. If you’re after buttery smooth fur transitions and have patience, choose oil. Watercolor is not recommended for realistic beagle painting — the white blaze and tan markings require opacity that watercolor cannot easily deliver.
Trade-off worth knowing: Acrylic lets you layer quickly, but you lose the ability to blend edges after 2–3 minutes. Work in small sections and use a wet palette. Oil gives you hours to blend, but you must wait days before adding fine details like whiskers. There’s no perfect medium — pick the one that matches your schedule and skill comfort.